

Mastering Martial Conditioning with Iron Palm Conditioning Bags

When it comes to martial conditioning, nothing beats the power and precision you develop through consistent training. One of the best tools I’ve found for building hand strength and toughness is the iron palm conditioning bag. This simple yet effective tool helps condition your hands, improve striking power, and build resilience. If you want to take your martial arts skills to the next level, mastering iron palm conditioning bags is a must.
Why Use Iron Palm Conditioning Bags?
Iron palm conditioning bags are designed specifically to toughen your hands and fingers. Unlike regular punching bags, these bags offer a unique density and surface texture that helps condition your skin, bones, and muscles. Over time, your hands become stronger and more durable, allowing you to strike harder without injury.
Here’s why I recommend iron palm conditioning bags:
Builds Hand Strength: The resistance helps develop muscles in your hands and forearms.
Improves Striking Power: Tougher hands transfer more force on impact.
Increases Endurance: Conditioning reduces fatigue during long training sessions.
Prevents Injuries: Gradual conditioning helps avoid bruises and fractures.
Enhances Focus: Training requires precision and control, sharpening your technique.
Using these bags regularly can transform your hand conditioning routine. They are perfect for martial artists, athletes, and anyone serious about improving their striking ability.

Choosing the Right Iron Palm Conditioning Bags
Not all iron palm conditioning bags are created equal. When selecting one, consider the following factors:
Material: Look for bags made from canvas, durable leather or synthetic leather. These materials provide the right balance of firmness and flexibility. I have always used canvas as the texture of canvas toughens the skin over time.
Size and Weight: Smaller bags are easier to handle and perfect for beginners. Larger, heavier bags offer more resistance for advanced training.
Filling: Traditional bags use sand or crushed stone for filling. Some modern bags use gel or foam for shock absorption.
Surface Texture: A slightly rough surface helps condition your skin better.
Portability: If you travel or train in different locations, a lightweight and compact bag is ideal.
I personally use an iron palm training bag combo that includes different sizes and weights. This combo lets me progress gradually and target different hand areas.
How to do iron palm training?
Starting iron palm training requires patience and proper technique. Here’s a step-by-step guide to get you going:
Warm Up Your Hands
Before hitting the bag, warm up your hands with light stretches and joint rotations. This prevents injuries and improves blood flow.
Start Light
Begin with gentle taps on the bag. Focus on accuracy and form rather than power. This helps your skin and bones adapt.
Use Proper Striking Techniques
Strike with the correct part of your hand - usually the palm heel or the base of your fingers. Avoid hitting with your fingertips or knuckles initially.
Increase Intensity Gradually
As your hands toughen, increase the force and speed of your strikes. Don’t rush this process; gradual progression is key.
Condition Different Areas
Rotate your strikes to condition the palm, fingers, and sides of your hand evenly.
Apply Dit Da Jow After Training
Use traditional herbal remedies like Dit Da Jow to help with recovery and reduce inflammation.
Rest and Recover
Give your hands time to heal between sessions. Overtraining can cause damage.
Consistency is crucial. Training 4-5 times a week for 20-30 minutes yields the best results.

Tips for Effective Iron Palm Conditioning
To get the most out of your iron palm conditioning bags, keep these tips in mind:
Stay Relaxed: Tension in your hands reduces effectiveness and increases injury risk.
Focus on Technique: Power comes from proper form, not just brute force.
Use Protective Wraps: Beginners should wrap their hands to protect skin while conditioning.
Track Your Progress: Note improvements in strength and pain tolerance.
Combine with Other Training: Use alongside grip exercises, wrist curls, and forearm workouts.
Listen to Your Body: Stop if you feel sharp pain or excessive soreness.
By following these tips, you’ll build stronger, more resilient hands that enhance your martial arts performance.
Integrating Iron Palm Conditioning into Your Routine
Iron palm conditioning bags are versatile and fit well into any training schedule. Here’s how I integrate them:
Warm-Up Tool: Use light strikes to warm up before sparring or heavy bag work.
Skill Development: Practice precise strikes to improve hand-eye coordination.
Strength Training: Use heavier bags or combos for power development.
Recovery Aid: Combine with Dit Da Jow to speed up healing after intense sessions.
You don’t need hours every day. Even 15 minutes of focused training can make a big difference over time.
Why Traditional Remedies Matter
After tough training sessions, your hands need care. Traditional herbal remedies like Dit Da Jow are invaluable. They help:
Reduce swelling and bruising
Speed up tissue repair
Improve circulation
Relieve pain and stiffness
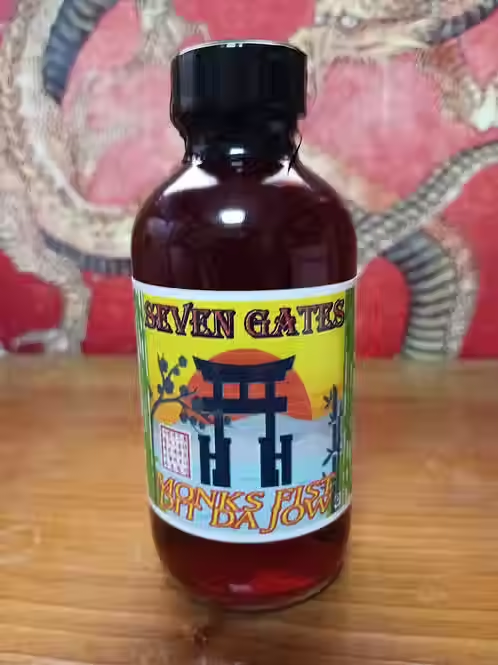
Seven Gates offers handcrafted Dit Da Jow formulas that complement iron palm conditioning perfectly. Using these remedies keeps your hands healthy and ready for the next session.
Ready to Master Your Iron Palm Conditioning?
Mastering iron palm conditioning bags takes time, patience, and the right tools. Start slow, focus on technique, and be consistent. Use quality bags and support your training with traditional remedies like Dit Da Jow. Whether you’re a martial artist, athlete, or fitness enthusiast, this training will boost your hand strength and striking power.
If you want to get started with a reliable set, check out this iron palm training bag combo. It’s a great way to build your skills progressively.
Train smart, stay safe, and enjoy the journey to stronger hands and better martial conditioning. Remember too that the iron arts are not limited to the hands and you can toughen most areas of your anatomy. This however requires different training protocol which I will reveal in a later post.


Comments